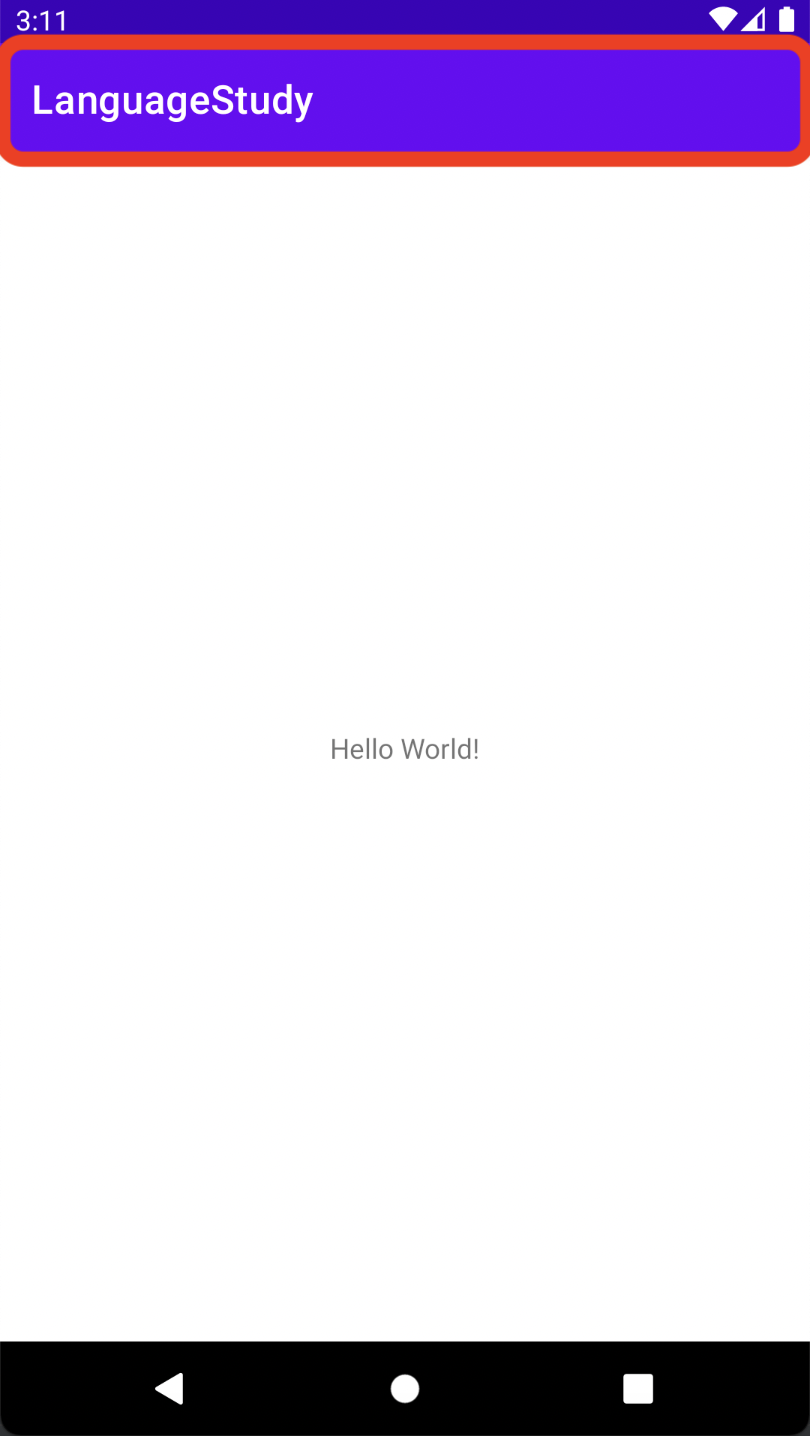
안드로이드 스튜디오를 통해 개발을 하다보면 사진 속 빨간 사각형인 타이틀바가 거슬리는 경우가 있다. 이 포스트에서는 이 타이틀바를 제거하는 세 가지 방법을 소개할 것이다. 이 중 가장 추천하는 방법은 첫 번째 방법인 themes.xml 을 수정하는 방법이다.
1. themes.xml 수정
최근 안드로이드 스튜디오가 업데이트 되면서 과거 styles.xml 에서 themes.xml로 변경되었다.

사진처럼 themes.xml에 <item name="windowActionBar">false</item> 와 <item name="windowNoTitle">true</item>를 추가해주면 된다. 추가로 노란색 사각형은 타이틀바 위에 있는 상태바의 색을 결정하는 곳이다.
이 방법은 후술할 다른 방법들과 다르게 문제가 생기지도 않고 버전이 달라져도 잘 작동하는 방법이다.
2. java 코드 수정
MainActivity.java에
ActionBar actionBar = getSupportActionBar();
actionBar.hide();
이 코드를 삽입하면 된다.
3. AndroidManifest.xml 수정
처음 프로젝트를 만들면 AndroidManifest.xml 가 아래와 같을 것이다.
<?xml version="1.0" encoding="utf-8"?>
<manifest xmlns:android="http://schemas.android.com/apk/res/android"
    package="com.example.프로젝트명">

    <application
        android:allowBackup="true"
        android:icon="@mipmap/ic_launcher"
        android:label="@string/app_name"
        android:roundIcon="@mipmap/ic_launcher_round"
        android:supportsRtl="true"
        android:theme="@style/Theme.프로젝트명">
        <activity android:name=".MainActivity">
            <intent-filter>
                <action android:name="android.intent.action.MAIN" />

                <category android:name="android.intent.category.LAUNCHER" />
            </intent-filter>
        </activity>
    </application>

</manifest>
이 코드에서 android:theme="@style/Theme.프로젝트명" 을 android:theme="@style/Theme.AppCompat.NoActionBar" 로 변경하면 된다. 아래는 변경된 후 AndroidManifest.xml 의 전체 코드이다.
<?xml version="1.0" encoding="utf-8"?>
<manifest xmlns:android="http://schemas.android.com/apk/res/android"
    package="com.example.languagestudy">

    <application
        android:allowBackup="true"
        android:icon="@mipmap/ic_launcher"
        android:label="@string/app_name"
        android:roundIcon="@mipmap/ic_launcher_round"
        android:supportsRtl="true"
        android:theme="@style/Theme.AppCompat.NoActionBar">
        <activity android:name=".MainActivity">
            <intent-filter>
                <action android:name="android.intent.action.MAIN" />

                <category android:name="android.intent.category.LAUNCHER" />
            </intent-filter>
        </activity>
    </application>

</manifest>

글에 문제가 있거나 질문이 있다면 댓글로 남겨주세요.